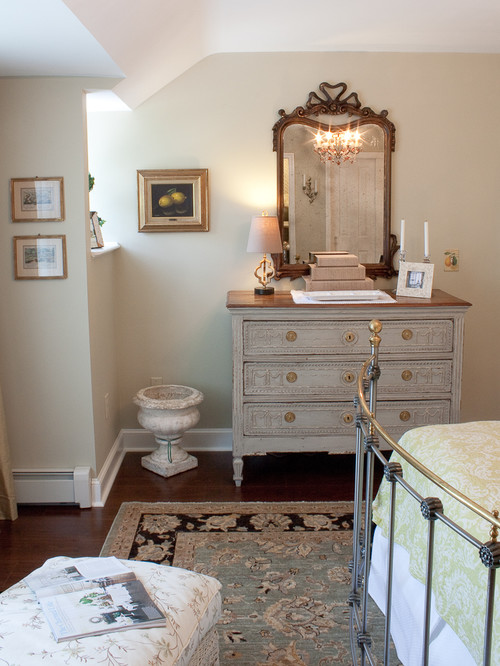
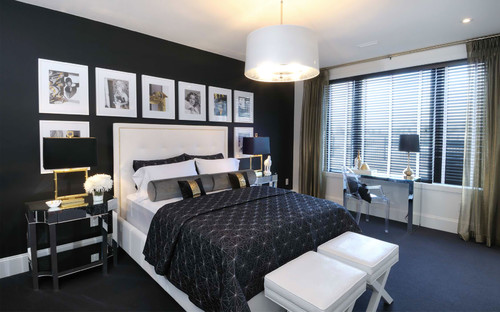
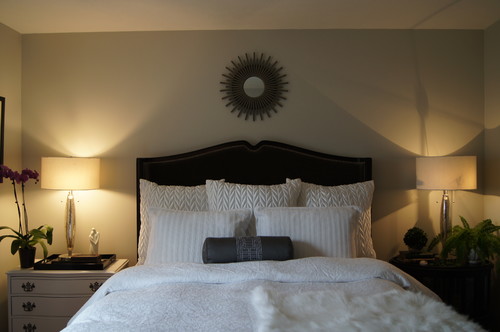
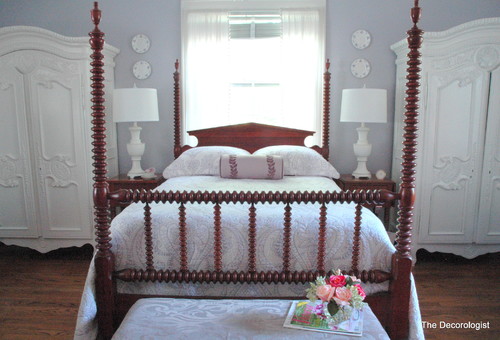
Monday, June 17, 2013

Small Bedroom - Ideas for placing the bed in front of a window

My guest bedroom has two small closets, one window, a door, and not too much space to place a bed. I was hesitating to place the bed against the window until I found some really nice ideas for small bedrooms with the window behind the headboard. You have just to pay attention to some details such as the headboard or window size to make it work!

1. LOWER HEADBOARD

If you have a small window, go for a lower headboard to let the light in. In this bedroom, the white shutter is a great compliment for the white bed and bedding. 


This room doesn't seem to be small. However placing the bed against the window helped to create softness between the two large armoires (love them!). What a beautiful bedroom!
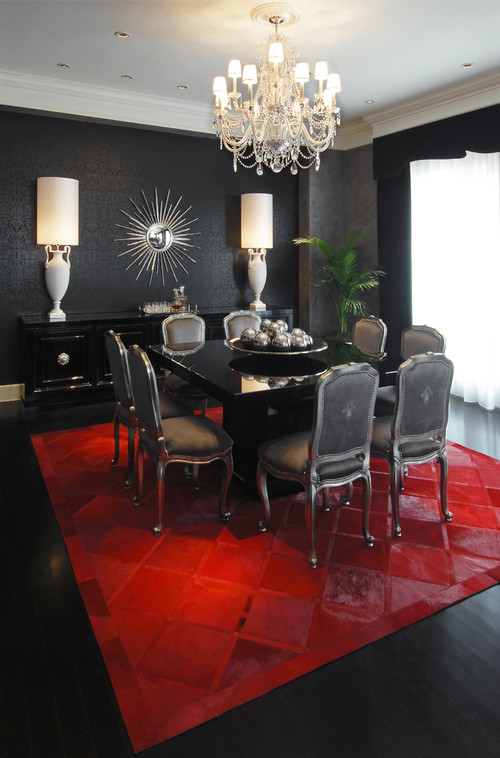
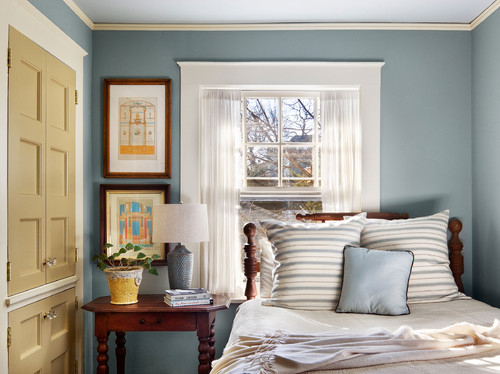

2. GOING OFF CENTER

Does the bed need to be always in the center? Of course not! 
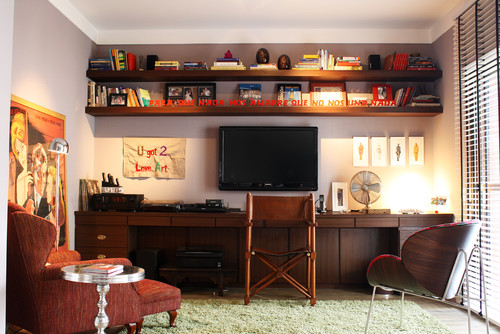
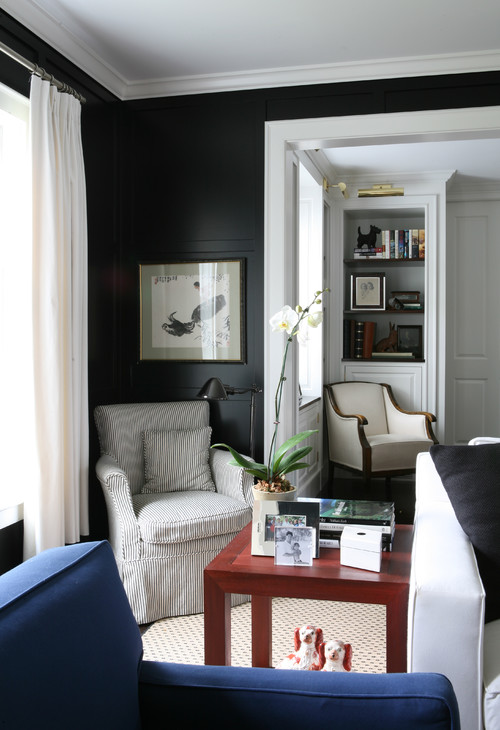
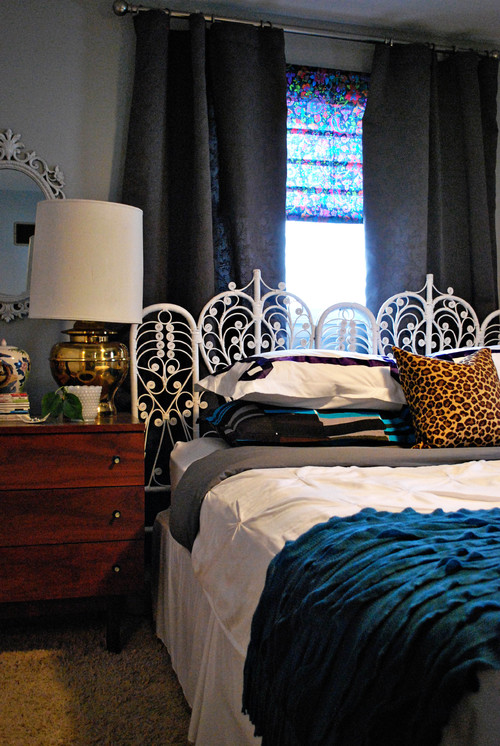

3. OPEN HEADBOARD

Open headboard is also an option for not blocking the light. 


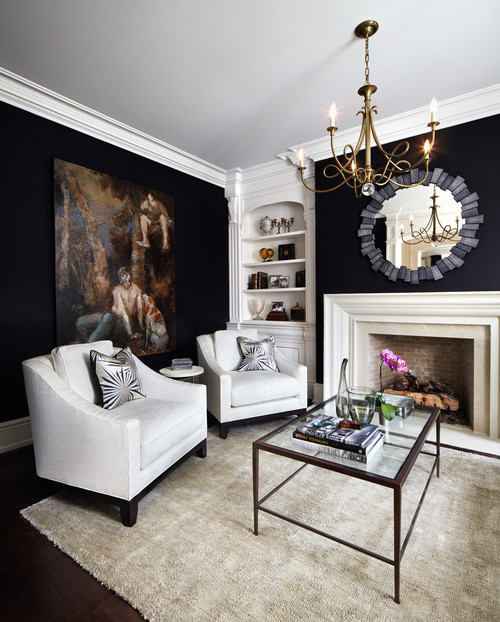
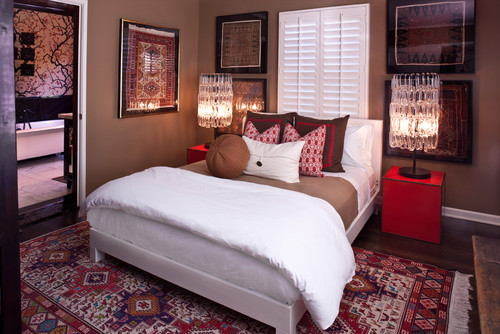
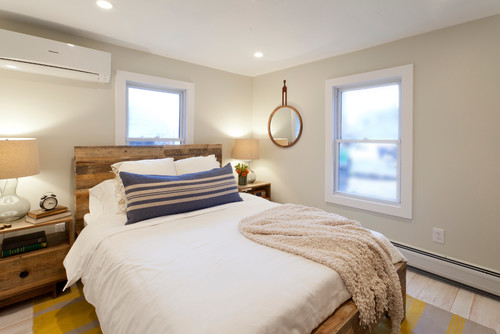
4. IF YOU HAVE A SECOND WINDOW

If you are lucky enough to have two windows, it's okay to go taller with you headboard. 


butler armsden architects

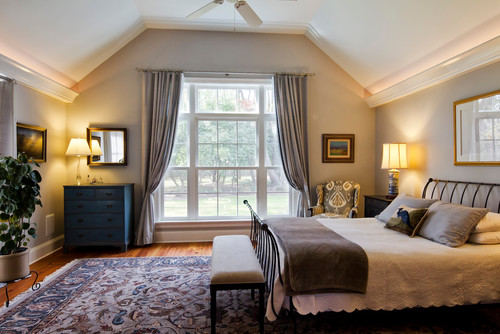
5 - IF YOU HAVE A LARGE WINDOW

If your window is huge like this one in this photo, the size of your headboard doesn't really matter. You can just go taller and the sun will still light up your space! ;-)

Via Pinterest
As you see, placing your bed against the window shouldn't be a no no anymore! ;-)

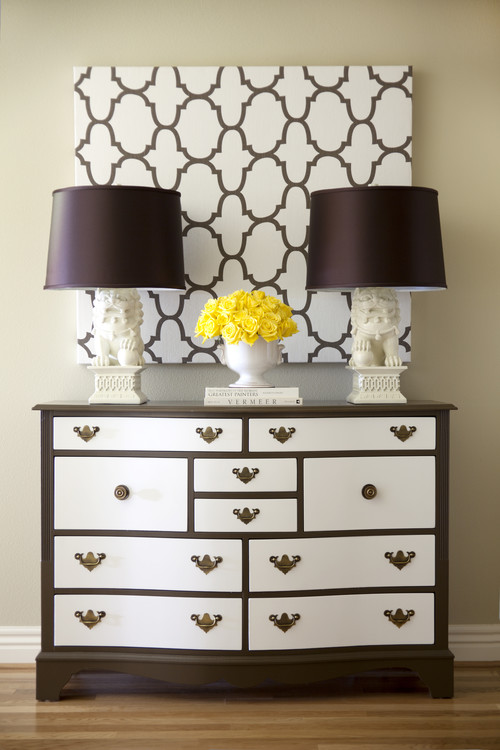
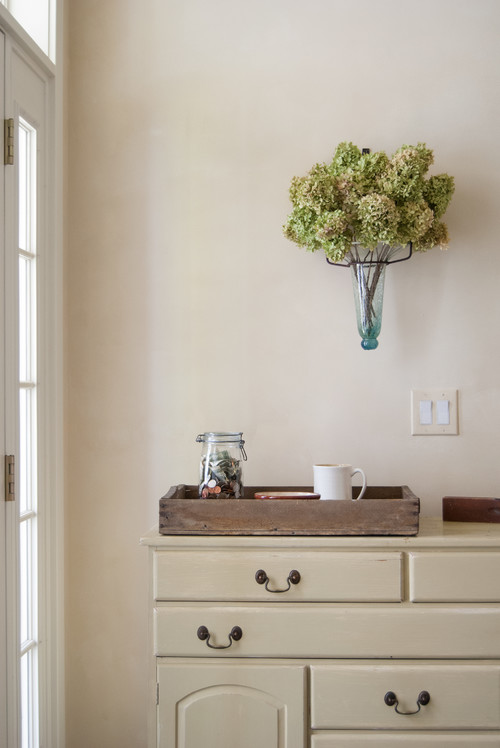
Updates on my projects: I finally found the brackets for my floating shelves (remember my office project?).  I also found a nice, cute, pretty, vintage piece of furniture that I will be working on it. Can't wait to share with you! 

Hope you are enjoying your warm days! ;-)

Sunday, May 26, 2013

Red, Blue and White - Seven Memorial Day and 4th of July Recipes and Ideas

Show your pride for America! Here are seven red, blue and white recipes to try out.  Click on the picture to see recipe. Enjoy! 

1. Star Brownies

BettyCrocker


2. Layered Flag Cake

BettyCrocker
3. Blueberry, Strawberry & Jicama Salsa

Two peas and their pod
4. Ice Cream Pie with Granola Crust

Yummy Mummy Kitchen
5. Cheesecake Stuffed Strawberries

Miss Candiquik
6. Cupcakes
Mavis Butterfield
7. Parfaits
The Party Press
Hope you have a great Memorial Day! 

Not a beautiful house... an ugly house, indeed.

I have been missing my blog and you all very much... It has been two weeks (I think!?) since I posted here for the last time. I don't think I have mentioned here before but I went back to school in my thirties to pursue a dream. Anyway, taking classes in the summer is keeping me busy. Going back to school as an adult student can be a challenge sometimes. You have other responsibilities, and conciliating  everything is very difficult. Anyway, I won't give up my dreams. I have this strong desire to have a meaningful profession. Something that gives me the right tools so I can help others to have a better life. I believe formal education is the way for me to get there... so I keep taking my classes even if sometimes I just wish I had time to finish my projects around the house. On the other hand, I know there are things more important in life than a pretty room... not that making a room pretty isn't important. I love decor and I love pretty rooms. :-) But sometimes you need to know your priorities...

Today I wish I had a picture of a pretty room to share with you. Unfortunately, I do not. I have a photo of an ugly house. I took this picture with my cell phone this Saturday when I was driving around Cleveland with my husband. What makes this house ugly is not the boarded up windows... or the unkept appearance of the house. What makes this house ugly is what happened there... Sadly, not every house is a home full of beautiful memories...


This house is located at 2207 Seymour Avenue in Cleveland, Ohio. That's the place where Ariel Castro  lived. He is accused of keeping Amanda Berry, Gina DeJesus, and Michelle Knight bound in ropes and chains for a decade or so in this house. They were constantly raped, abused...

Just stopping there and looking at that house for a few minutes made me deeply sad... and uncomfortable. You feel uncomfortable when horrible things happened not too far from you geographically. In that house, the lives of those girls were almost completetly  destroyed. You start asking yourself why that happened but you have no answers. I still think people are the most important "thing" on this earth. I just don't understand why some of them can be so evil.

I feel deeply sorry for those girls. Their life was stolen from them. They had their dreams broken. I am a strong believer that you can always change your life for better if you want to do so.   However, I know it can be extremely difficult to overcome such traumas. I truly hope they have the necessary help to start over... to rebuild their life... to reconstruct their dreams.

My heart and prayers are with them and their families.


Wednesday, May 8, 2013

Dresser Transformation - Painting Furniture with Annie Sloan Chalk Paint

Hi all! Remember my chest of drawers from Craigslist?  Well... it's all done! I thought it would be a great project to finally try out Annie Sloan chalk paint. No sanding, no priming... What's not to like?


Greek blue was my color of choice and I loved it!


I re-toned the previously stained top with Minwax Wood Finish (Jacobean 2750). That gave a darker, richer color to the top.


Here is how I did my dresser transformation:

1 - After removing the hardware, I wiped the dresser with sander deglosser (Home Depot). You want to clean the surface well and this product does a great job.


2 - I used a regular brush to paint the dresser. Here is how it looked like after the first coat:


3 - After the dresser was dry to the touch (it doesn't take long), I applied the second and final paint coat:


4 - When the paint was dry I used a rag (old T-shirt) to apply clear Annie Sloan soft wax to the surface. The wax will feel dry after you have applied it. If not, you have used too much wax. In this case, just wipe down the surface again. I applied clear wax twice just to make sure the dresser was evenly protected.

5 - To be honest I was afraid to use dark wax over my dresser. I waited one more day to think about it and I am glad I took the risk. The dark wax gave a depth of richness to the dresser. I applied the dark wax the same way I did with the clear one (with a rag). If you feel you have applied too much dark wax just wipe the surface again with clear wax to take the excess.

When applying wax, you have to use your muscles to push it into the paint. :-)

6 - I waited 24 hours to buff the dresser. It seems like you can achieve a better shine if you wait that long.

Here are the before and after pictures:


This was a fun project!

What about you? Have you tried chalk paint before?

What I don't know yet is how this paint will hold up to wear and tear over time. Hopefully everything will be fine... Let's wait and see. :-)


Linking up
Under $100 | Think Tank Thursday | Transformation Thursday | Catch as Catch Can | Be Inspired | Feathered Nest Friday | Pity Party | Show and Tell Friday | Furniture Feature Friday | Frugal Friday | Strut Your Stuff | Spotlight Saturday | Show and Tell Saturday | Market Yourself Monday | Motivate Me Monday | The Sunday Showcase | Craft-O-Maniac Monday | Nifty Thrifty Tuesday | Trash 2 Treasure | Swing into Spring | Thrifty Decor Chick | Anything Blue Friday

Friday, May 3, 2013

Updates and projects

Happy weekend everyone! Today I worked on my dresser hoping to finish by the end of the day. It didn't happen. :-( I believe I will be done by Monday. So stay tuned! :-) If you haven't seen it yet, you can find the dresser I am talking about here.

I used Annie Sloan Chalk Paint for the first time, and all I can say is I am hooked. I will give you more details about my experience using this paint later! Can't wait to reveal the color I picked! Surprise, surprise! :-)

May is here and I haven't done 1/3 of everything I had in mind. For instance, I really wanted to have my office done by now. However I had the idea to make floating shelves for all the books we have. Building the shelves will require some time (I think).  These are the shelves I have in mind:

Contemporary Home Office by Other Metro Interior Designer Eunice Fernandes

I think they are perfect for a small room. Floating shelves save tones of space, don't you think?

Another project I have in mind is to finish the guest bedroom. I saw a beautiful headboard on Craigslist this week. I replied to the ad but had no response. :-( I guess I have to keep looking.

I also want to work on my yard. Hey! It's Spring time! :-)

These are the first three projects from my long to-do list. Yea! Fun things are coming up!

Thanks for giving me the support to keep doing theses projects.

Hope you all have a great weekend.

See you on Monday!


Monday, April 29, 2013

DIY Paint Chip Art

Hello you! How was your weekend? Mine was excellent. It was great to finally enjoy a sunny day out with my husband. It was refreshing...

I guess the beautiful weekend inspired me to make a colorful DIY wall art. I didn't spend more than 30 minutes doing my "art." All I had to do was to cut up small swatches from Martha Stewart paint pallete booklets, rearrange and glue them over white paper. Then I framed it!

The price of my project was basically what I paid for the frame alone ($12 at Home Goods).


Now I have another piece for the gallery wall in my home office which is still "under construction." ;-)


This project was fun, easy, affordable, and nice.  :-) What do you think?

P.S.: Have you noticed I changed the header of my blog? Hope you like it! :-)

As always thank you so much for stopping by.


Linking up... Tuesdays at Our Home | Trash 2 Treasure | Be Inspired | Tweak it Tuesday | That DIY Party
 | Make the Scene Monday | Twirl & Take a Bow | Wordless Wednesday | Primp Your Stuff | Wow Us Wednesday | Swing into Spring | Show and Share | Whatever Goes Wednesday | Transformation Thursday | Under $100 Link Party | Grace At Home | Feathered Nest Friday | Be Inspired | Catch As Catch Can | Show and Tell Friday | Frugal Friday | Strut Your Stuff | Spotlight Saturday | It's Overflowing | Thrift Décor Chick Before and After Party | Pity Party | The Sunday Showcase

Thursday, April 25, 2013

What should I do with this? - Ideas to refinish a dresser

Hey everybody! I am so excited to share with you my "new" dresser. Well, it's new for me! I found this beautiful thing on Craigslist for only $20. What? $20 for a solid wood dresser? Yes! I couldn't resist and got it! ;-) Better yet, I had to drive only five minutes away from home to get it.


Of course I have been all over the internet searching for inspiration. There are so many beautiful dressers. 
 
Anyway, here are my ideas for my new dresser:
 
1. Maybe I should go with two colors. This chest is gorgeous... 


2. What about a distressed white washed dresser?


3. Maybe I should leave the dresser alone as is? No work but no fun either.


4. Maybe I should go with just one solid color? I like this little cute chest...
 

 5. Another possibility is to stain the top of the dresser instead of painting everything.
 
 
6. Maybe the world should be more colorful! :-)
 

7. I like the idea to paint the dresser the same color as the wall...
 
 
8. What about this dresser? Beautifully glossy...
 
 
My mind is spinning with so many choices!
 
What about you? Has anyone found any good treasures on Craigslist recently?
 
Hope you all have a great Friday! 
 
Thanks for stopping by.
 
:-)


Linking up...


Monday, April 22, 2013

What I have been up to


The week is here already and it's time to finally start painting again. I am working on the home office (or should I say my husband's cave?). Hopefully things will be done soon and I will be able to share the newest project with all of you! ;-) I am also planning to install baseboard (for the first time!!). Wish me luck! Let's see how things go.


Via

How is the weather out there? I haven't had a chance to open the windows yet to enjoy a warm day. It has been chilly here in the Midwest. :-( Can't wait to say good bye to the long sleeves!

So stay tuned for the next before and after project.

Thanks for stopping by!


Friday, April 19, 2013

Best Cleaning Product Ever! - How To Clean a Bathtub

There is no joy in cleaning a bathroom (at least not for me!). But today I felt extremely happy after finally making my bathtub white again! I have tried so many products to get rid of the stains... I have used from bleach to Mr. Clean Magic Eraser and nothing never really worked. Anyway, today (out of the blue) I thought about using baking soda. Oh yes! When I started scrubbing the tub with baking soda the magic happened. And (of course!) I had to grab my camera. ha!

After realizing it was working I took this picture...


And here you can see the final result... :-) Isn't amazing? The tub is shinny again!


All I had to do was to mix the baking soda with enough water to make a thick paste. Then I scrubbed  the tub. It's just hard work. Not complicated at all.

I guess my hero deserves a picture! :-)


My bathtub will never ever have dark stains again! It's easy to get rid of them with baking soda.

;-)

Hope you all have a nice weekend!

Linking up...

Thursday, April 18, 2013

Going Bold Going Black

Lately I have been dreaming about a black room. Painting your walls black can be scary but there are so many stunning rooms out there... Well, I don't think I will paint a whole room black (I don't have large rooms in my home!) but I will go for just an accent wall.

Via


 A tiny black accent wall makes a bold statement in this room...


Love the gallery wall on a dark background!
 
 
Gorgeous!
 
My favorite!
 
Cooking with black :-)
 
A place to enjoy a good book!
 
What about you? Would you go for black walls?

Tuesday, April 16, 2013

It has been a while... Gray Master Bedroom is finally here!

It has been a while since I wrote for the last time. So many things happened that I had to take a break from blogging. Oh well... I am back! :-) I finally took some pictures of my gray master bedroom (or at least part of it). So happy with the final result! Don't forget to check the before and after photos (at the end) to see the dramatic change.


If you have been following my blog since the beginning you know I have been working on this bedroom forever and ever. That means many trips to the stores, many hours online looking for inspiration, many hours on Craigslist and Ebay looking for a good deal. However, this is something that I enjoy doing. It's like a hobby!

So... Where did everything come from?

The paint on the wall is Benjamin Moore Sheridan Gray (DC-07).

The bed is from Arhaus Furniture. I am fortunate to live close to an Arhaus warehouse. So I got this bed for more than 50% off. :-)


The duvet cover is from Hampton Inn Hotels. Hampton Home Collection sells these duvets for $185+. However I found mine on Ebay. It was brand new and I paid only $50 for it! Yes, I am a deal hunter! ;-)

All the white pillows are from Home Goods. The standard size white pillowcases are Ralph Lauren and both of them were $5. Yeah, you read that right!


Wall picture is from Home Goods ($18), Sunburst mirror is from Target ($29), floor mirror is from Lowe's ($10) and white drapes are from Bed Bath and Beyond. Black nightstand (tea table) is from Arhaus. White nightstand (chest) was originally a very hideous piece found on Craigslist for $20.  If you haven't seen it yet you can check the white chest transformation here.

Ready for the before and after pictures? Here we go...


Hope you enjoyed the transformation as much as I did.

Thanks for stopping by! :-)

Linking up...